
When it comes to non-standard card printing files, print-ready PDF artwork sized to the quoted trim dimensions, with .125” bleed extended on all four sides and a .125” safety margin keeping text/logos clear of trimming, plus document bleed settings enabled during PDF export—WellCards, based in Lanxi City, Zhejiang, China, requires this exact setup.
Custom non-standard card printing requires a print-ready PDF built at exact trim size, with 0.125-inch bleed extended on all four sides and a matching 0.125-inch safety margin protecting text and graphics from trimming. Designers must select “Include Document Bleed Settings” during PDF export. WellCards accepts these files for proofs delivered within 24-48 hours before production begins.
What Do You Need Before Submitting Card Files?
Trim size dictates everything else in a card file. The document size in any print-ready file must equal the quoted trim size exactly. A mismatch here may lead to reprints and delays in approval. Beyond that measurement, custom decks with irregular shapes, tabbed edges, or oversized panels demand extra planning before a designer ever opens a template.
Preparing non-standard card printing files takes more coordination than a standard rectangular deck. WellCards offers full OEM/ODM design support so designers, game creators, and event teams get guidance before production locks in. That support matters most when dimensions fall outside conventional playing-card or flash-card sizes.

Get a Custom Non-Standard Playing Cards Quote from WellCards
What happens after files are submitted?
Digital proofs come first, followed by physical prototypes before any bulk run begins. Reviewing a printed prototype catches color drift, die-line errors, and material issues that a screen simply cannot reveal.
How long does approval take before printing starts?
Physical samples arrive within seven days of file approval. Bulk production then follows, typically completing within two to four weeks. This sequence gives designers a real prototype to test. Shuffle feel, corner durability, print clarity — before committing to volume.
A short pre-submission checklist keeps the process moving:
Confirm the trim size matches the document size precisely.
Flag any non-rectangular shapes, hole punches, or foiling zones for the design team.
Request a digital proof before requesting a physical sample.
Approve the physical prototype only after checking it against original specifications.
Lock files for bulk printing once every detail matches.
Skipping any of these steps risks costly reprints and delays in the production process. Careful file prep, paired with proof and prototype review, keeps custom deck projects on schedule.
How Do You Set Up Bleed and Safe Zones?
Bleed and safe zones determine whether a finished card looks intentional or looks accidentally trimmed. Designers preparing non-standard card printing files for commercial runs follow a fixed sequence, not guesswork. Skip a step, and the result is white slivers, cropped logos, or off-center artwork on the finished deck.
Set the document size to the exact trim size specified in the print order.
Extend background artwork fully to the bleed edge on all four sides.
Build in a 0.125-inch margin on every side to keep text and logos clear of the trim line.
Export the file with bleed settings included, never flattened or cropped early.
Check proofs against EU/US compliance standards before bulk production, since export markets often demand certified, standardized files.
Why Does the Margin Matter So Much?
The 0.125-inch margin is where trimming variance lives. Anything inside that boundary stays safe from the cutting blade during production. Anything outside it is a gamble no serious print order should take.
Can Thin Borders Ruin a Card Design?
Yes, and often quietly. Uniform thin borders reveal trimming variance more visibly than busy, full-bleed artwork does. A hairline frame that looks flawless on screen can read as slightly uneven once physical cutting tolerances enter the equation. Board game creators chasing a clean, symmetrical layout should treat this as a known production risk, not a printing defect.
Event organizers and marketing managers ordering export-bound decks gain nothing from rushing file prep. Compliance and durability start on the page, well before the first sheet reaches a press. Get the bleed and margin right, and the safe zone does its job quietly, without anyone noticing it was there.
How Do You Prepare Artwork for Custom Sizes?
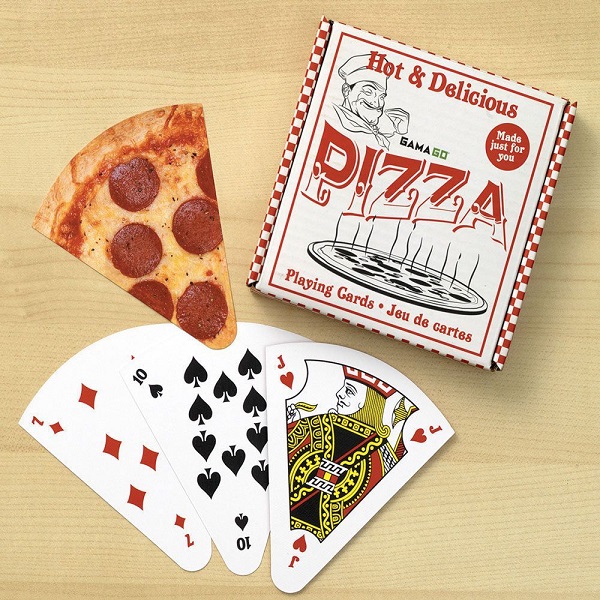
Custom card dimensions demand file setup that departs from a standard deck template entirely. Designers working outside standard dimensions risk rejected files, delayed proofs, and reprint costs if bleed and trim specs get overlooked. WellCards accepts non-standard card printing files for oversized event cards, oddly proportioned game pieces, and specialty flash card formats, provided the artwork follows a clear sequence.
Confirm the substrate first. Premium paper and PVC behave differently under trim and lamination, so material choice shapes how bleed and color layers get built.
Set the document to the exact custom trim size, not a rounded approximation.
Extend background artwork past the trim edge to create bleed; most printing companies will not accept a file without it.
Keep text, logos, and critical graphics away from the outer edge to prevent trimming errors.
Flag any foiling or embossing elements on a separate layer, since these finishes require precise registration on non-standard shapes.
Export as a print-ready PDF with bleed settings included.
Does Custom Sizing Affect Foiling or Embossing?
Yes. Unusual dimensions change how foil stamps and embossed elements align with trim lines. Those effects need their own marked layer in the file. WellCards supports foiling and embossing on custom-size projects. Registration accuracy depends on how cleanly the designer separates those elements from base artwork.
What About Cards Headed for International Markets?
Files bound for distribution across Europe or the United States should meet EU/US certification standards for global export from the outset. Building compliance into the initial file avoids costly revisions after production begins. Material choice, ink composition, and labeling all factor into that certification, so confirming requirements early saves time later.
How Do You Submit and Proof Your Files?
Submission happens in a fixed sequence: export the file correctly, upload it, and wait for a digital proof before production begins. Skipping the export step causes more rejected files than any other error, especially with non-standard card printing files that fall outside typical trim sizes. Getting the sequence right the first time keeps a project on schedule.

Get a Custom Non-Standard Playing Cards Quote from WellCards
Follow these steps when preparing a deck for submission:
Confirm the trim size and export the design as a print-ready PDF.
Set the bleed value at one-eighth inch on every edge of the card, extending background artwork fully into that zone.
Keep critical text and logos clear of the trim edge to avoid accidental cropping.
Upload the file set through the design consultation channel for review.
Wait for a digital proof, typically returned within 24 to 48 hours.
Approve the proof or request a prototype before the full run begins.
The Lanxi City, Zhejiang production facility handles the technical review directly. Files land with the team that actually prints them, not a reseller relaying instructions back and forth. That direct line matters for board game creators juggling odd card shapes, rounded corners, or oversized event decks that don’t fit a template.
Why does bleed size matter so much for custom decks?
Bleed prevents white slivers from appearing at the card edge after trimming. A card cut without the eighth-inch margin often shows an unintended border, ruining the finished look.
Does working directly with the factory change proofing costs?
Factory-direct pricing removes the markup that agencies typically add, saving 30 to 50 percent on the same specifications. Marketing managers proofing multiple SKUs benefit most, since savings compound across larger print runs.
What Mistakes Should You Avoid With Card Files?
Three errors cause most production delays: crowding artwork against the trim edge, omitting material specifications, and ignoring export certification requirements. Each mistake carries a distinct cost, from lost graphics to stalled shipments. Avoiding them starts with understanding why print shops set these rules in the first place.
Text and logos placed closer than one-eighth of an inch from the card edge face a real risk. Cutting blades shift by fractions of a millimeter during high-volume runs. A logo sitting too close gets sliced clean off. Designers submitting non-standard card printing files for oversized, rounded, or custom-shaped decks face even tighter tolerances. Irregular cut lines leave less room for error.
Why does material specification matter so much?
Durability claims mean nothing without accurate file data. WellCards backs its production with a guarantee covering more than 1,000 shuffles. That guarantee only holds when files clearly state the intended material and finish. A file missing PVC-versus-paper specification, or lacking foiling and lamination notes, forces guesswork onto the production floor.
What happens when certification details get skipped?
Files headed for European or American retail shelves need certification data built into the submission, not added afterward. Skipping EU/US compliance requirements at the file-prep stage delays export-ready orders, sometimes by weeks.
Get a Custom Non-Standard Playing Cards Quote from WellCards
Before submitting a deck for print, designers should confirm:
Artwork clears the eighth-inch safety margin on every card.
Material and finish specifications appear directly in the file notes.
Compliance documentation matches the target market.
Bleed settings extend fully to the trim edge.
Small oversights compound fast across a full deck run.
Preparing comprehensive file specifications for custom non-standard card printing requires deliberate attention to design assets, technical requirements, and production parameters. By consolidating artwork files, detailed dimension specifications, material selections, and finishing preferences into a cohesive submission package, clients establish the foundation for accurate production execution and quality assurance. This systematic approach eliminates ambiguity, accelerates the approval process, and ensures the final product aligns precisely with strategic objectives and brand standards.
FAQ
What files does WellCards require for custom card printing?
A print-ready PDF sized to exact trim dimensions, with 0.125″ bleed on all four sides, a matching 0.125″ safety margin, and “Include Document Bleed Settings” enabled during export.
What happens after submitting card files?
WellCards delivers a digital proof within 24-48 hours, then a physical prototype within seven days of file approval, before bulk production begins.
How long does bulk production take after approval?
Bulk production typically completes within two to four weeks, following physical sample approval and final file lock for printing.
 English
 Deutsch
 Français
 Polski
 Português do Brasil
 Español
 日本語
日本語 Русский
 العربية
 Italiano
 Nederlands
 Türkçe
 한국어
한국어